We’re currently well into the winter season and before you know it, spring will be here and so will be the riding season. The pandemic that has been going on for the last two years has opened people up to new ideas and they’re willing to try new things just to explore the outdoors.
One of the best ways to do so is to go riding or off-roading. If you can afford it then buying a new vehicle is great, however, for those on a tight budget, it makes sense to buy a used one or restore that old ATV or dirt bike that’s gathering dust in the garage.
Evaluate the condition of the ride and restore it to the best working state before you even insert the key in the ignition. Once you know where things stand for your bike, you’ll need to repair any damage or replace parts that are no longer in working condition.
You’ll find all spare parts and tools in specialty online stores like ZMPerformance. The website has everything from riding gears to parts for ATV, UTV, and dirt bikes at a reasonable price.
However, before you go ahead and spend any money, it’s essential to bring your ride out of the shed and give it a complete look over. There are several basic things to check while restoring an old vehicle, let’s take a look.
Replace Engine Oil and Filter
The first thing you must do is to remove the drain plug and dump the old oil. The contaminants in the old oil will not do your engine any favors and end corroding or damaging it. Fun fact: a new engine costs almost as much as a new vehicle. So, you need to dump that oil and change the filter before everything else.
Check the manufacturer’s oil recommendation for the particular make of your bike and replace the old oil with the same. Look out for the color of the old oil, if it’s dark then simply replace it. However, if the oil appears milky, it means water has mixed with and that’s indicative of a leaking gasket. Replacing the gasket, oil, and filter will help your old quad bike or motorcycle get a new lease life.
Spruce up the Fuel System
Gasoline these days contains ethanol that doesn’t last forever and the fuel in your old bike has likely gone bad. Remove the fuel cap and take a whiff, if it smells like gasoline then everything is well. However, if it smells like turpentine then it’s time to remove the old fuel and clean the fuel system.
Old and broken down fuel is known for leaving resinous deposits in the fuel injectors and carburetor. Moreover, old fuel also absorbs water, which corrodes the internals of the injectors, carburetor, and metal fuel connectors if it has been sitting for too long. All these will need to be cleaned before you can run the machine.
To spruce up the fuel system, you’ll first need to drain the old gasoline. After that depending on the fuel system in your vehicle, you can either strip and clean the carburetor or service the fuel injectors. There are several OEM and aftermarket kits available to do this yourself.
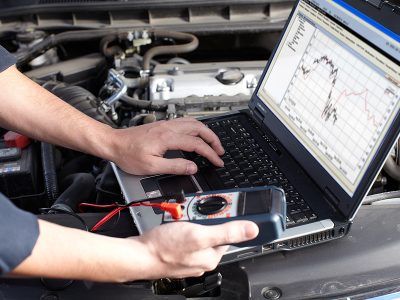
Redo the Electrical System
The next step is to check the electrical system of the vehicle like push start, batteries, wiring circuits, and others. This can easily be done using a digital multimeter and is an easy process. The first step is to do a visual check of the wiring harness for any signs of physical damage.
A vehicle that has been in storage for too long is bound to have wires chewed by rodents, which will need replacing. It’s also a given that the battery has either died or is not functioning at its best, so that’ll need a replacement as well. To fully restore your old bike — especially if it has been gathering dust for too long— it’s best to get the entire electrical system replaced.
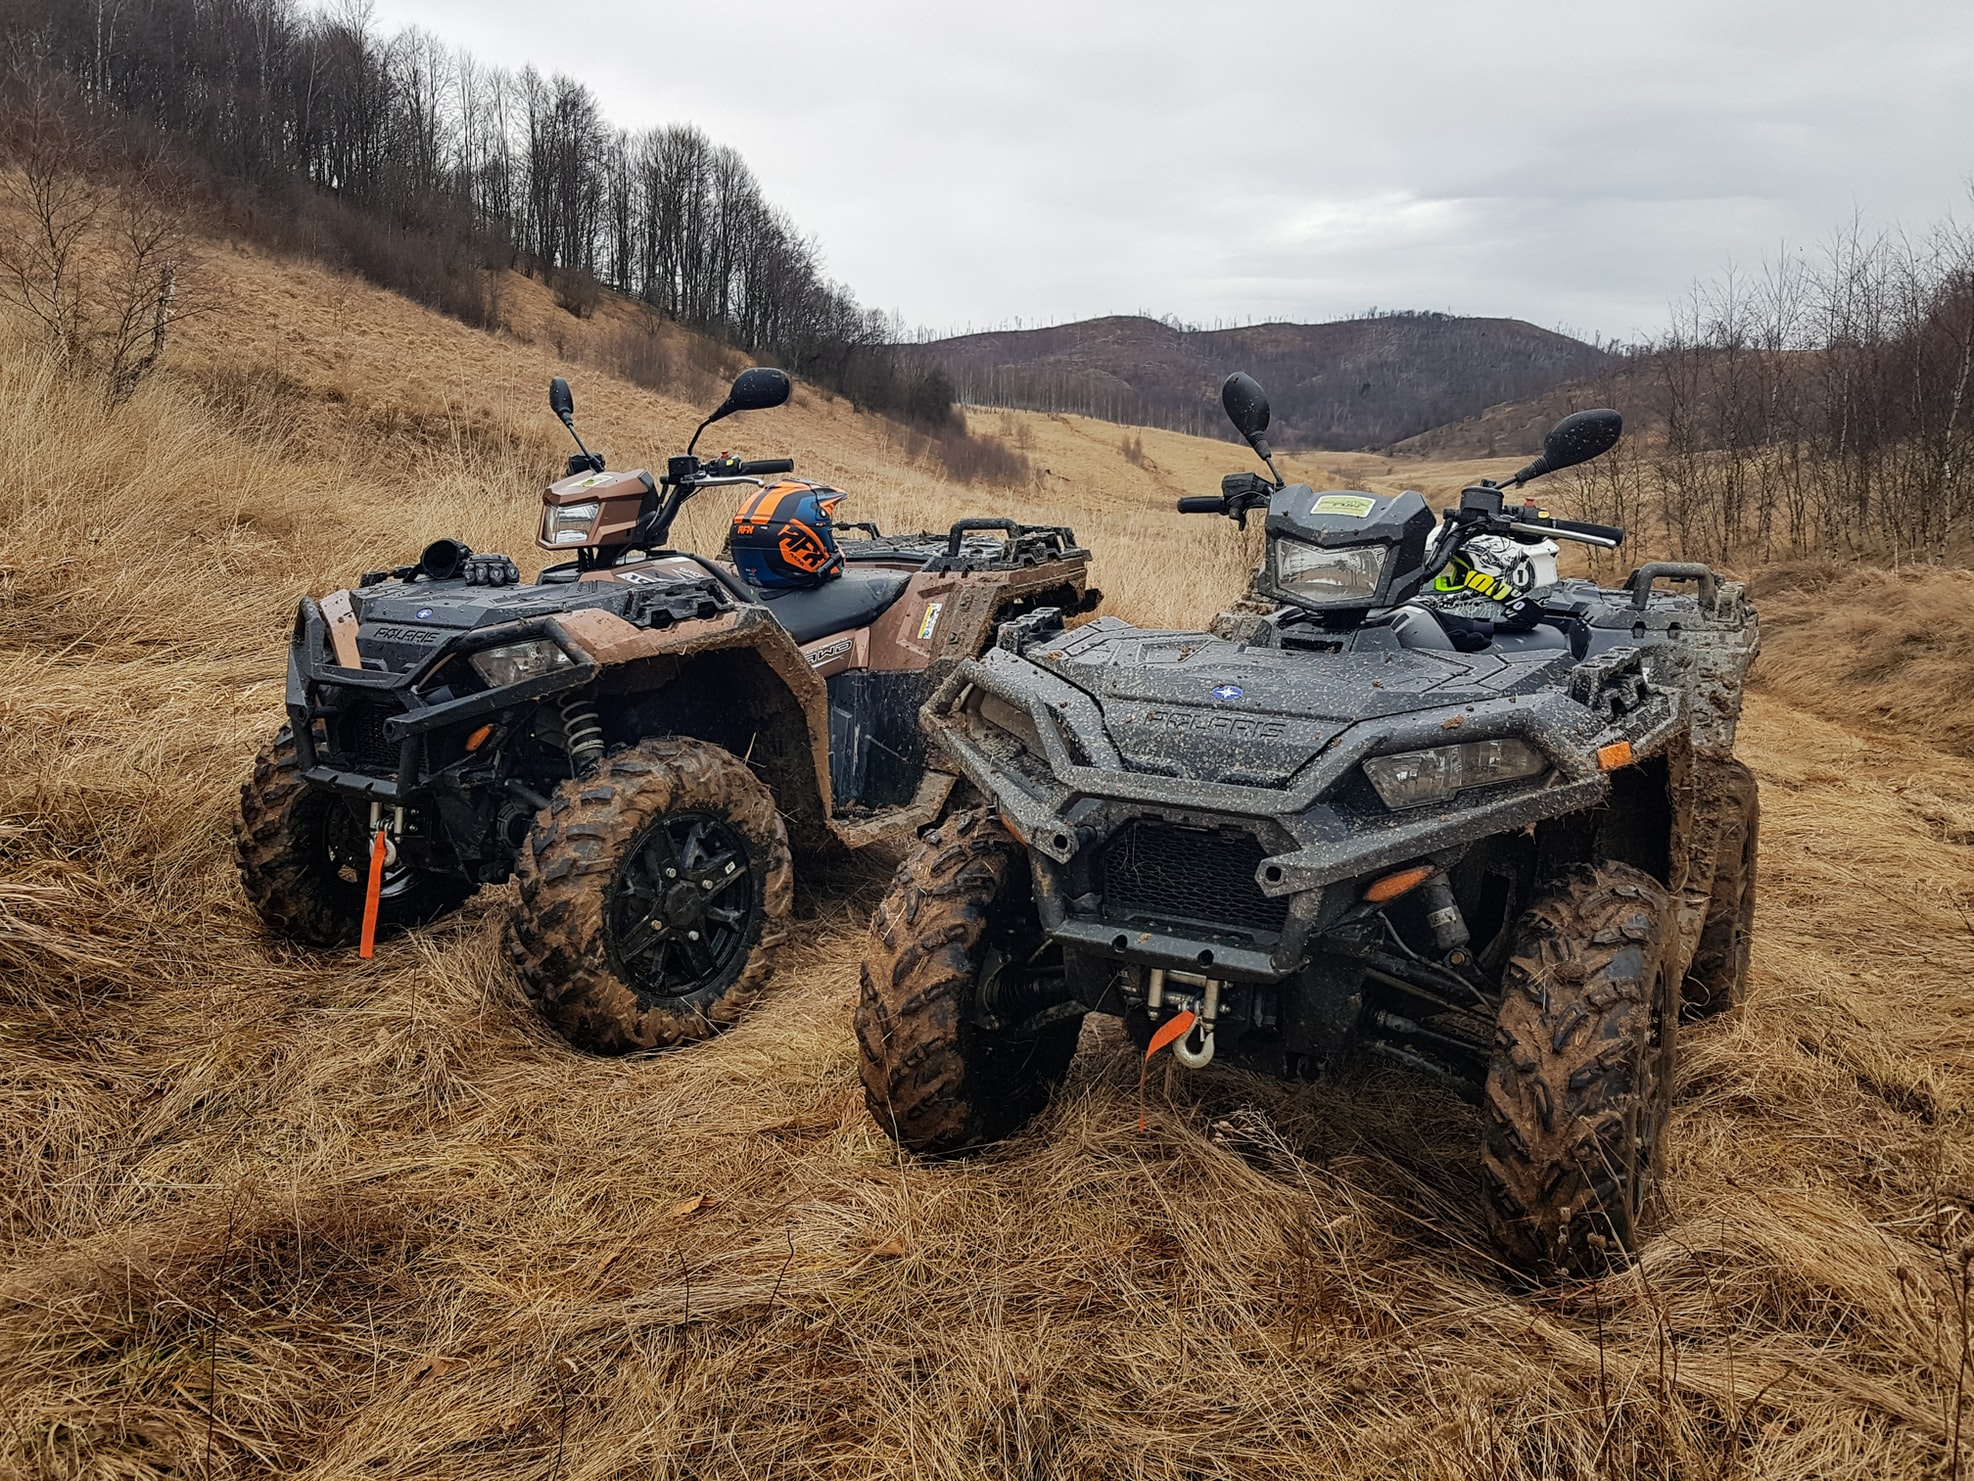
Make Sure to Check the Frame and Suspension
Any rider worth their salt will tell you that a bent frame or damaged suspension is dangerous. To check for frame damage, look up the dimensions of the vehicle and then measure your vehicle diagonally from the front wheel hub to the rear wheel hub.
While a minor deviation is okay, anything more will require a frame straightening or replacement. Since riding is dangerous by itself, it’s best to have a professional inspect your vehicle declare it safe to ride before storming off.
Look for things like wheel and handlebar alignment, loose front forks or rear shock absorbers, oil leaking from forks, and any damaged suspension components. If you’re restoring an ATV or UTV, look out for control arms, steering knuckles, shock absorbers, and steering arms.
The suspension should feel smooth and fluid when it compresses and rebound. Since frame and suspension are your first line of safety while riding, it’s best to get them in the best possible condition before you ride.
Change Wheels and Tires
Last but not the least, check the condition of the wheels on your vehicle and tires. Lift the vehicle off the ground and rock the wheel side to side or in and out. If there’s any kind of give, it means you need to replace the ball joints or bearings. Also, look for any sort of dent or bend in the metal frame of the wheel.
Next, check your wheels for visible signs of aging. Check the treadings and inspect the sidewalls for any cracks or splits. These will tell you whether the rubber has worn down and might blow out while you’re charting a rough terrain. Needless to say, tires without any treads or visible damage need immediate replacement before you even think of hitting the road.
There you go, these are the top things to look out for when inspecting an old ATV or a dirt bike. Knowing what needs to be replaced or serviced, will make the whole restoration project a breeze. Moreover, you can rest easy knowing that your bike (quad or dirt) will not give up on you when you’re out riding through the woods.